Wednesday, January 20, 2010

Framed Photos


Thanks to the gals over at Shanty2Chic for giving me the inspiration for this piece. One of the things I love about it is the ease of changing out photos. I don't know about you, but I get a bit tired of having decade-old photos of my family on the walls. While a few "vintage" shots are cool, I don't need to be looking at my 80s hair day in and day out. With this particular set-up, you can change out the photos with NO hassle whatsoever. Awesome.
I actually made this about a month ago, but haven't been able to post about it, since it was a Christmas gift for my parents. And since we kept having delays in them coming for Christmas, I've had to keep this beauty to myself. No longer! They were hear this weekend, and the frame is now safely in Iowa.
In case you're interested in making one of your own, here's how I did it:

First, I collected the frames. It was kind of a bugger to find a nice, large frame that wasn't a million bucks or plastic. I didn't find any I liked at Goodwill, and the ones at Michael's were 50% off, but that was still a pricey option. Until I walked by this fixture back by custom framing that had a bunch of odd frames hanging off of it. As much as I love the Ooops! paint from Lowes, aparently Michaels has Oops! frames! I got this large, heavy, solid wood custom frame for $8. Eight dollars, people! I think I'm in love.
So my other frames I picked up at Goodwill. Got several different sized, all different colors, but that won't last long. I also picked up a "B" at Walmart (for Brown, my parents' last name) and sprayed all of it black.


 Since this custom frame was an Oops, there was no glass or backing or hanging mechanism to go along with it. The glass was no problem, because I didn't want any anyways (so there!) but I would need a backer. I ended up buying a foam tri-fold display board and cutting it to size.


 To cover it I used a dropcloth from Lowes.


 Super cheap, love the texture. I cut it a few inches larger than my custom-foam board, then used spray adhesive to stick it on.


 This was my first time using spray adhesive, and it was pretty cool! It stuck really well.... at least for the first week. As the project sat languishing in my room, waiting to be gifted, I did notice that the adhesive was more sticky than adhering. But it was likely user error. I didn't exactly follow the directions exactly (gasp!).
Anyhow, before I arranged the frames, I removed all hardware from the back--hangy-things, clippy-things, turny-things, all of it.


 I then arranged the frames how I wanted them, and hot-glued them to the drop-cloth board. I then got those magnetic bull-dog clips from walmart and hot glued them on.
All that was left was to choose the picures. I had five openings, so I had one picture for each family unit (my brother, my sister, me, and my parents) plus one of the grandchildren together. I printed them all in black & white to keep it from looking too busy. The frames are all different styles, remember, though since I painted them all the same black, it looks cohesive enough.
I finally attached a wire to the back using a picture-hanging kit, and it was ready to go!


 I'm pretty sure my parents loved it, and I loved that it was fun & easy to make, and pretty cheap, too.


Thursday, January 14, 2010

First dresser re-do

I finally finished my first painted dresser. I think it came out well. I had found this dresser on CL for $25. It was a little beat up, and had a handle broken. I liked the lines, but didn't like the flecked-wood look of 1970. I decided it was a good price to try my first painting job. I KNOW I took a before picture, but I can't for the life of me find it. So here you can see at least the corner of it....


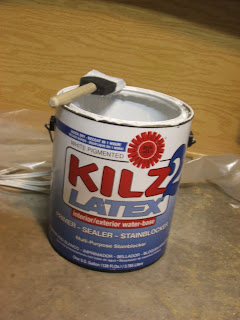
I started by removing all the hardware & giving it a good sand. I then wiped with a damp cloth to remove all the dust. I gave two coats of primer, using this:


Yes, I used a foam brush for this. I think it worked out pretty good, actually. Here's after the first coat:

And the second:

I used and Oops! paint I found at Lowes for $2. It's a pretty close match to the blog-celebrity Heirloom White, and it was in a matte finish. I've never worked with a matte finish before, but I really liked it. I like the not-shiney-ness of it. And again, I used a foam brush. It was actually very helpful for getting in the crevices.

Here we are after one coat:

And two coats:


I then gave her a light sand (yes, it's a her... with legs like that, it's got to be a her!)
I then used some leftover paint from my bedroom re-paint, and trimmed in the groves. This was actually pretty tricky, and required the use of my daughter's new Crayola craft paint brush set she got for Christmas. She doesn't know she donated to the cause, since I was doing it while she slept.
I then gave her a light sand,


and wiped her down with a damp cloth.


After making sure it was COMPLETELY dry, I sprayed two coats of Polycrylic satin. It gave it a very nice, light sheen, and should hopefully help to protect it a bit from scratches and dings. Time will tell.


So here she is, happily hanging out in our bedroom:


Related Posts with Thumbnails